The only camera gear you need for landscape photography
Intro
I have been into landscape photography for the past 5 years, not because I planned it, but because I love being in the outdoors. In today's digital world, being alone in nature is a rare and profound experience, and I found that photography helped me capture those magical moments.
In this article, I'll be sharing what I've learned over the years regarding the gear you might need to become a great landscape photographer. Although having the best equipment won't automatically make you a better photographer, it will make your photography life easier. With better gear and organization, you'll spend less time on your equipment and more time taking photos. This is a summary of my experiences, and I hope it will help you decide what gear you need, or at least what will help you out in the field.
What is landscape photography?
Landscape photography is a genre of photography that captures the essence of nature, often emphasizing wide vistas, dramatic skies, mountains, rivers, forests, and other natural features. The primary focus of landscape photography is to convey the feeling of being present in the scene, allowing viewers to appreciate the grandeur and serenity of nature.
Landscape photography is also in my opinion an umbrella for many other genres within photography such as seascape, astro photography, and macro photography.
They all share the idea of capturing nature, in one way or another.
Beyond all Landscape photography requires patience, planning, and an eye for detail. Photographers often spend days scouting locations, waiting for the right lighting conditions, and composing their shots to create compelling images that evoke emotion and inspire viewers to connect with the natural world. This means you will benefit from having the gear you need and skip the things you don’t. Take care of your gear and stay organized and spend more time on the fun stuff!
Camera equipment for landscape photography
Camera
The camera is the number one tool you need for any type of photography. But what camera should you have? I would say any digital camera will do, even a good phone will take great photos today so before deciding what camera to use one must consider different aspects and what result you’re striving for.
If one is serious about landscape photography and wants to be a photographer a digital DSLR or mirrorless camera is preferred. The main reason is not megapixels but a digital camera is made for photography and a phone is not, not yet anyway. With that said, if a phone is all you have you can still do landscape photography before investing in new equipment.
Mirrorless vs DSLR
DSLR (Digital Single-Lens Reflex) cameras and mirrorless cameras are both types of digital cameras, but they have distinct differences in their design and functionality.
There is still a huge market for DSLR and you can find great deals on the second-hand market, the mirrorless is the new kid on the block and I switched over to mirrorless some 2 years ago when I got my Nikon Z6ii. From a quality standpoint, there is not much to say, they both take excellent photos but they also have some differences as listed below.
Mirror Mechanism:
DSLR: DSLR cameras use a mirror mechanism that reflects light entering through the lens up into an optical viewfinder. When you press the shutter button, the mirror flips up, allowing light to hit the image sensor and capture the photo. This mechanical procedure is responsible for a DSLR camera's distinctive sound.
Mirrorless: Mirrorless cameras, as the name suggests, don’t have the mirror mechanism found in DSLRs. Light passes directly through the lens onto the image sensor, which sends a preview of the image to the rear screen or an electronic viewfinder (EVF).
With no mirror to flip up and down, the mirrorless camera process is quieter and quicker.
Size and Weight:
DSLR: DSLR cameras tend to be bulkier and heavier due to the internal mirror and prism system.
Mirrorless: Mirrorless cameras are generally more compact and lightweight since they do not require the mirror mechanism. This makes them more portable and convenient for travel and everyday use.
Autofocus System:
DSLR: DSLRs traditionally use phase-detection autofocus, which relies on a separate autofocus sensor dedicated to detecting phase differences to achieve focus. This method is highly effective in good lighting conditions, but it can struggle in low light or when capturing high-contrast scenes.
Mirrorless: Mirrorless cameras often use contrast-detection autofocus, which analyzes the contrast in the scene directly from the image sensor. However, many modern mirrorless cameras also incorporate phase-detection pixels on the sensor itself, providing fast and accurate autofocus performance.
Battery Life:
DSLR: DSLRs typically have better battery life compared to mirrorless cameras, partly because they do not require power to operate an electronic viewfinder continuously.
Mirrorless: Mirrorless cameras tend to consume more power due to the constant operation of electronic components like the EVF or LCD screen. However, advancements in battery technology have improved the battery life of many mirrorless models. I don’t see any huge drawback on my mirrorless camera, especially if you apply the correct settings in the camera itself.
Lens Compatibility:
DSLR: DSLRs have a wide range of compatible lenses available from various manufacturers. However, compatibility can be limited across different brands.
Mirrorless: Mirrorless cameras offer more flexibility in lens compatibility due to shorter flange distances, which allow for the use of adapters to mount lenses from other systems.
Both DSLR and mirrorless cameras have their advantages and disadvantages, and the choice between them often depends on factors such as personal preferences, intended use, budget, and specific features required by the photographer. I will never go back to DSLR, mainly because it’s the future and I like the EVF since you will in real-time see what your settings will have for impact on your photo before even taking it.
DSLR vs Mirrorless camera
Full frame camera vs APS-C camera
Besides choosing between DSLR and mirrorless you also need to choose between different sensor sizese. The sensor is the electronic pieace capturing the light and different senor types have different characteristics. The most commonly used sensor types are Micro 4/3, APS-C and Full frame. To put it extremely simple, the size of the sensor is deciding how large your window in your house should be.
Full-frame cameras and APS-C cameras are in my opinion the two most common types in digital cameras. Here's a comparison between the two:
Sensor Size
Full-frame: These sensors offer a larger surface area compared to APS-C sensors, resulting in better light-gathering capabilities and potentially higher image quality, especially in low-light conditions. This can be of great importance if you will do landscape photography in low light conditions such as sunsets/sunrises or even more so if doing astro photography.
APS-C: APS-C cameras have sensors that are smaller than full-frame sensors.. The smaller sensor size affects the field of view and depth of field compared to full-frame cameras.
Field of View
Full-frame: Full-frame cameras provide a wider field of view compared to APS-C cameras when using the same focal length lens. This means that lenses will capture a wider scene on a full-frame camera.
APS-C: APS-C cameras have a narrower field of view for the same focal length lens compared to full-frame cameras. This is due to the crop factor associated with APS-C sensors, which effectively magnifies the image.
Depth of Field
Full-frame: Full-frame cameras typically produce shallower depth of field compared to APS-C cameras when using the same aperture and focal length. This can be advantageous for achieving selective focus and background blur in portraits and close-up photography.
APS-C: APS-C cameras have greater depth of field for the same aperture and focal length compared to full-frame cameras. This means that more of the scene will be in focus, which can be beneficial for landscape and architectural photography.
Price and Size
Full-frame: Full-frame cameras tend to be more expensive and larger in size compared to APS-C cameras, primarily due to the cost and size of the larger sensors and associated components.
APS-C: APS-C cameras are generally more affordable and compact than full-frame cameras, making them a popular choice for enthusiasts and beginners who want a balance between performance and affordability.
Lens Compatibility
Full-frame: Full-frame cameras are compatible with both full-frame lenses and APS-C lenses. APS-C lenses can be used on full-frame cameras, but there may be vignetting or image quality issues around the edges of the frame.
APS-C: APS-C cameras are compatible with APS-C lenses, but not all APS-C lenses are compatible with full-frame cameras. Using APS-C lenses on full-frame cameras may result in vignetting or reduced image quality.
The choice between a full-frame camera and an APS-C camera depends on several factors, such as budget, intended use, size and weight preferences, and compatibility with existing lenses. Both types of cameras have their advantages and limitations, and the best option for you will depend on your specific needs and preferences as a photographer.
Personally, I used to have an APS-C camera and was very happy with it. However, when I switched over to the Nikon Z6ii, which is a full-frame camera, I noticed a huge upgrade in photo quality when shooting the night sky. The camera handles noise so much better, and it's no longer an issue to use very high ISO numbers.
Best Lenses for landscape photography
When it comes to choosing lenses for landscape photography, there are numerous opinions. However, most photographers would agree that a wide-angle lens is the foundation for landscape photography. Nonetheless, landscape photographers always have a diverse range of lenses in their camera bag.
If you're new to photography, you might wonder why different lenses are necessary. Lenses are made of glass that is shaped differently to achieve diverse properties. Some lenses are designed for capturing distant objects, while others are made for extreme close-up photography. It is impossible to use a single lens to capture all scenarios due to the laws of physics. Before discussing lenses, it's important to understand that every lens is marked with numbers that indicate the optical properties of that particular lens.
For example:
NIKKOR Z 20mm f/1.8 S ⌀77
20mm is the focal length, or the field of view.
f 1/8 is the aperture of the lens. Aperture refers to the opening in the front of the lens, it can be closed down or opened up.
⌀77 is the diameter of the lens
Below we will mainly discuss the focal length.

Nikkor 20mm lens
Different type of lenses
Ultrawide-angle lens
Focal lengths under 16mm fall into this category, and they’re generally considered specialist lenses, used only for certain circumstances, such as astrophotography scenes where you want to capture the whole Milky Way band. Fish-eye lenses are a type of ultrawide lens that have a full 180-degree field of view, and as a result have a distinct, circular, distorted look.
Wide-angle lens
Ranging from 16mm to 24mm, these lenses are wide without falling into fish-eye territory, where extreme stretching of the frame occurs. The sweet spot for most landscape photography lies between these focal lengths, but you can use this range for any number of everyday uses too.
Standard wide-angle lenses
Focal lengths from 24mm to 35mm generally get labeled as “standard.” This is a great range for getting wide shots without too much distortion. But if you want a lens that really opens up tight spaces, such as cityscapes or small rooms, you might want to go wider.
Telephoto lenses
A focal length around 70mm and higher is considered as a Telephoto lens and are designed to magnify distant subjects and compress the perspective between foreground and background elements. These lenses are great for landscape photography since you often have great distances in nature and every landscape photographer should have one in their bag. It might sound perfect to always use a wide angle lens to capture as much as possible, but the truth is its not always easy to find a composition that works when you have too much in the frame. On a wide angle lens distanced object looks smaller as well making it hard sometimes to get the photo you want.

Angle of view for different types of camera lenses
To summarize you can use any lens in the beginning and work you’re way forward in the jungle of lenses, if possible I recommend to start with a lens in the range of 20-70mm. The term “Holy Trinity” refers to the three essential lenses that cover a wide range of focal lengths. The 16-35 lens provides a wide angle, the 24-70 lens is a versatile all-around option, and the 70-200 lens offers a telephoto range.
Tripod - your best friend and worst enemy
As a landscape photographer, it's essential to have the right gear. While modern cameras come with built-in image stabilization, there's still a limit to how long you can hold your camera steady before your photos start to get blurry. Image stabilization helps counteract camera shake, but as you increase shutter time, it becomes less effective. That's where a tripod comes in.
To understand when you need a tripod, let's look at two photos. In the first photo of the northern lights, it was pitch black, and I had to use a shutter speed of several seconds to capture enough light. Without a tripod, the photo would likely have been blurry and useless.
In the second photo, I used a long exposure to create a sense of movement in the water. While I didn't need a tripod for this shot, it's an excellent example of when you might want to use one creatively.
That said, a tripod is bulky and heavy to carry around, so most landscape photographers don't use it for every shot. Use it wisely and only when you need it to capture the perfect shot!
Best tripod for landscape photography
If you're planning to buy a tripod, you'll soon realize that there are a lot of options out there. The price range is vast, ranging from 50 EUR/USD to 2000 EUR/USD. As a first-time buyer, I would recommend finding a tripod around 200-300 EUR/USD. Avoid buying the cheapest ones, as they're not stable enough and may break easily. Similarly, don't go for the most expensive ones either. Invest in those when you know what to look for. While a tripod can be great for capturing dramatic landscape photos, you don't necessarily need one right away. You'll naturally reach that point when you feel it's time to get one.
Personally, I use two different tripods. One is a travel tripod, which is smaller and more lightweight, making it perfect for traveling and hiking. You can find a tripod weighing around 1kg. It may not be as sturdy as a bigger, heavier tripod, but everything in life is about compromises.
The second tripod I have is a full-size, high-end one. I use it every time I'm not hiking due to its weight.

Image of the northern light

Image of waterfall with long exposure
Filters
When it comes to photography filters, the only ones that I use are ND filters, which stands for Neutral Density. These are black filters that block light from reaching the camera sensor. ND filters come in different numbers such as ND8, ND1000, and so on. The higher the number, the more the filter blocks light. ND filters are necessary when you want to create photos such as those of waterfalls, where you want to capture the movement of water while preventing overexposure of the rest of the photo due to too much light reaching the sensor.
A polarizer is another type of filter that I use, which takes away glare and reflections. This filter is useful when shooting water such as lakes and oceans, as water can reflect a lot of light that may not be desired in the photo. A polarizer also enhances the colors in the photo.
Filters come in two forms: circular and square. The square ones require a filter holder that is attached in front of the lens, and the ND filter is then slid into the holder. They are bulkier and take up more space in your bag, but they fit every lens as long as the holder matches the lens. The circular ones are often magnetic and attached to a circular holder that is screwed onto the lens and left there most of the time. The holder is magnetic so that you can easily click on the magnetic filter whenever you need it. These filters are very small and take up very little space in your bag, but the downside is that you need a filter of the same diameter as your lens.
If you have several lenses of different diameters, it's best to buy an ND filter that matches the biggest lens and then use filter adapters to scale down the diameter to match the smaller lenses. This works well if the difference between your lenses is not too large. Otherwise, you will need to buy different sets of filters to match the different lenses.
Filters will not make you a better landscape photographer, just like a tripod won't. However, they will increase your creativity and possibilities as a photographer.

Cirkular ND + Polarizing filter from Kase
Cleaning kit for camera and lenses
If there is one thing you need to have as a photographer, it's a cleaning kit. Your camera and lenses are bound to attract a lot of dust, water spots, sand, and dirt, and there's no way of avoiding it. Thus, it's better to be prepared to deal with it. Although you can find cleaning gear for absurd prices, I have always used a basic kit from Zeiss, and it works just fine. Just make sure you have a cloth, a brush, and an air blower at your disposal.
For cleaning the lenses, I also use cleaning fluid, and for cleaning the sensor, I use a swap stick. However, it's essential to note that you should never use any other fluids on the lens or sensor except for the specially dedicated ones.

Cleaning kit from Zeiss
Remote trigger
A remote trigger is essential ifripod for long exposures. It's very useful to have a remote trigger because you won't touch the camera and cause vibrations thatfinal photo. You can also use the camera's built-in time delay, which can be set to take the photo 1-3 seconds after pressing the shutter button. However, this method has limitations. For instance, if you want to capture a photo of a wave crashing into cliffs, it's hard to account for the built-in timer of 1-3 seconds.r to press the remote trigger precisely when you want to start taking the photo. you plan to use filters and a t can affect the It's much easier to press the remote trigger precisely when you want to start taking the photo.
Remote trigger also comes in different costs but I only use a basic one from Nikon. Some remotes have timers built in for doing time laps and other things so pick one that suits your needs.
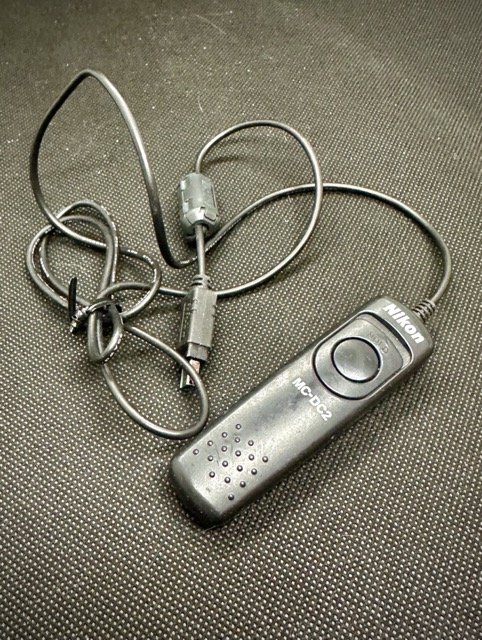
NikonMC-DC2 Remote trigger
Accessories
In addition to cameras, lenses, tripods, and other photography equipment, many other small items can make your photography experience easier. Here are some of the things I use and find helpful.
First, it goes without saying that you need power to use your camera. Make sure to have extra batteries on hand. I have four, but I recommend having at least one spare.
A power bank is also an essential item. While not all cameras can be powered directly from a power bank, at least you can charge spare batteries, your phone, and other small devices.
Memory cards are also important. I have ten 32GB cards, each labeled 1 to 10 and stored in a small hard case. When hiking or traveling, I use one card per day. This way, if I lose or damage a card, I don't lose more than one day's worth of photos.
Don't forget to have all the necessary cables, adapters, and chargers on hand as well.
I keep all of these items in a small accessories bag from Lowepro. This way, I can easily grab the bag and put it in any camera bag, knowing that I have everything I need.

Lowepro Accessories bag
A proper Camera bag
If you own a camera, lens(es), tripod, and other accessories, it's essential to invest in a good camera bag. The type of bag you need will depend on the activities you plan to undertake. Keeping your gear organized is crucial for better focus on photography. Besides, you've invested a lot of money in your gear, and protecting it is a wise decision in the long run. I use different bags for different purposes; for instance, when hiking, I prefer a hiking backpack because there's no hiking backpack that also accommodates camera gear.
I highly recommend Lowepro camera bags. I've tested several of their products, including bags, inserts, and accessories, and I'm delighted with their design and durability. They have not failed me yet.
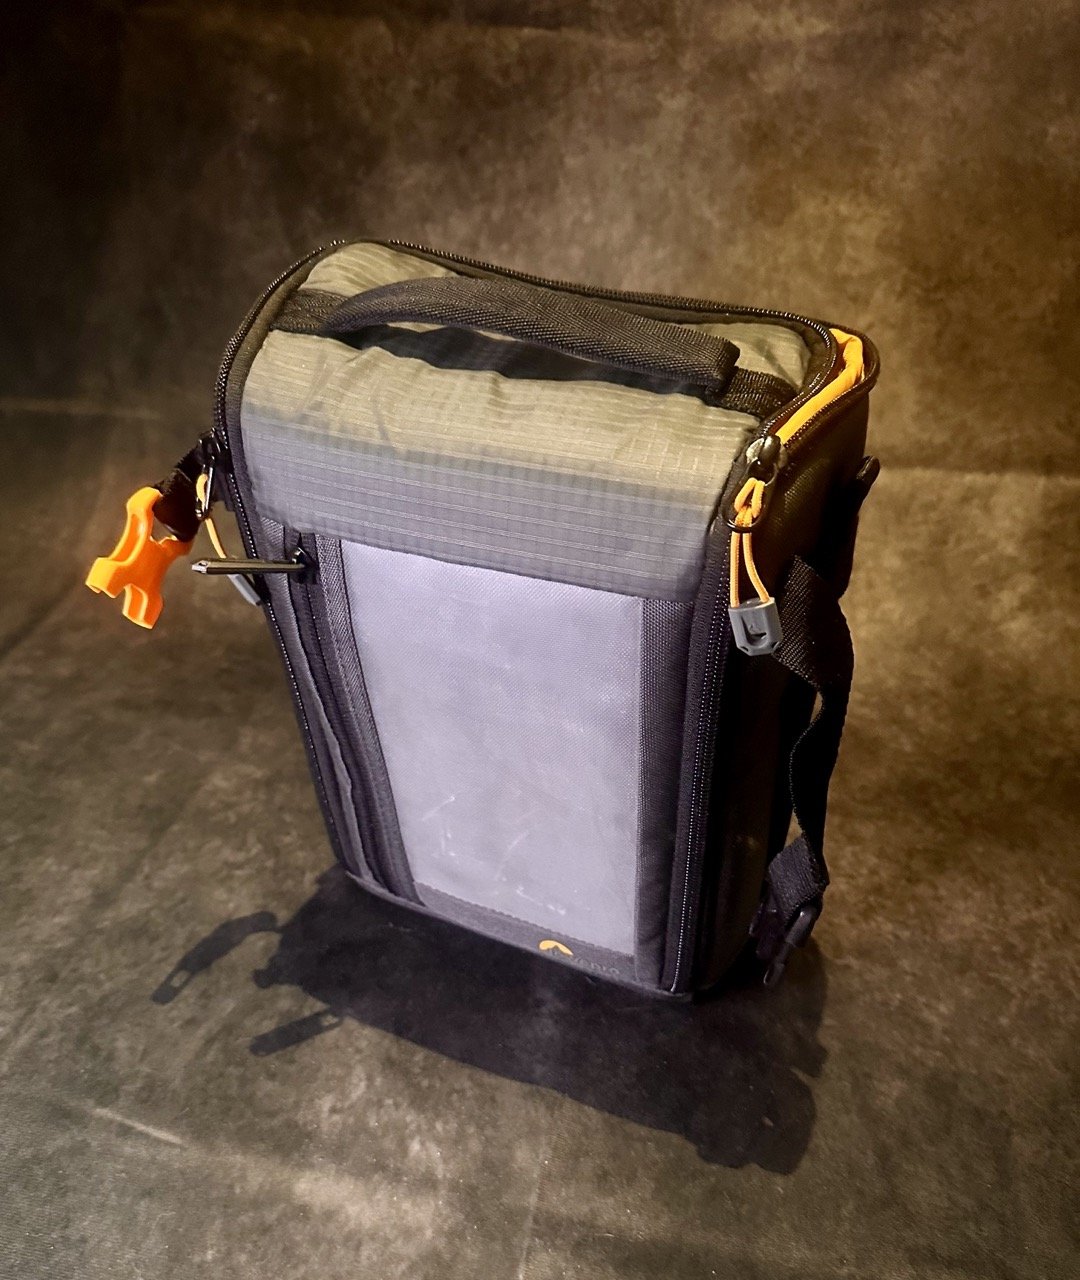
Camera bag for Short walks close to home
For short walks close by like in your city or local beach I recommend a small bag to have over your shoulder. It’s an easy way with fast access to you’re camera but still be protected against weather and impacts if dropped. The downside is of course a smaller bag doesn’t fit as much gear as a larger bag.

No name Shoulder bag
Camera bag for Day trips
If you're planning to go for a day trip outside your immediate neighborhood, such as a forest or a seascape along the shore, I recommend using a slightly biggerbe walking most of the time, a backpack is the best choice. However, if you're only carrying a lighter weight and not planning for a very long walk, a shoulder bag would be okay. But, it can become uncomfortable for longer periods. In a backpack, it's not as easy to access the camera and gear, but many bags today are designed very well for photography. bag.

Lowepro Flipside Trek BP 350 AW camera backpack
Camera bag for hiking
I spend a lot of time hiking in the mountains and therefore, I recommend using a backpack for hiking. However, I haven't found the perfect backpack that can accommodate both camera and hiking essentials, so I suggest using a separate backpack for hiking if you plan to bring a tent, sleeping bag, etc.
For your camera and lenses, it's best to find a small camera bag that's streamlined and doesn't have a harness. While hiking, I usually keep my camera in this small bag tucked inside my larger hiking backpack or attached to the chest strap of my backpack. If you keep your camera in your backpack, you may find it inconvenient to take it out and put it back in every time you want to take a photo. Therefore, I only keep it on my chest when I need quick access to it, such as when I'm moving fast or walking over rough terrain. However, this means that the camera is not protected against weather and impact in case of a fall. Therefore, it's important to ensure that both the camera and lenses are weather-sealed.
Lowepro GearUp Creator Box XL II camera insert bag
Camera bag for Overseas trip
When it comes to travelling overseas for hiking purposes, I have always preferred renting a car to travel around instead of flying. As a result, I have never had to use my hiking backpack. However, if you plan on carrying a camera with you, be aware that airport baggage handlers may not treat your luggage with care. Therefore, it is essential to have a bag that not only keeps your gear safe but also meets airline regulations. Additionally, remember to keep all batteries in your carry-on luggage and not your checked-in baggage for safety reasons. The Lowepro bag listed below is accepted as carry-on luggage on all airlines that I know of.

Lowepro Pro Trekker BP 450 AW II camera backpack